Graininess in photos can take on many forms. Technically the film grain present in older photos is different from the digital noise in modern digital cameras, and was caused by imperfections in the material that made up the film.
Nowadays however the graininess in photos is mostly due to image noise and takes the form of speckles of tiny pixels scattered across the photo. It is caused by poor exposure that in turn may be due to the size of the sensor, low-light conditions, or an excessively high ISO setting on the camera.
The best solution is to avoid capturing grainy photos in the first place by always making sure there is plenty of light – and also checking your camera settings. However that isn’t always possible, and invariably you will snap some photos that contain more grain than you’re comfortable with.
If and when that happens, you can edit and remove the grain from your photos – provided you know how.
Using PhotoWorks to Remove Grain and Noise
It can be frustrating to try to remove grain from photos while at the same time maintaining their quality and color balance. That is why it helps to have an intuitive editor such as PhotoWorks that makes it easy to learn how to fix grainy photos.
In PhotoWorks you don’t need to manually edit and remove grain and can rely on one of its tools to do it automatically. After you’ve loaded the photo that you want to edit you can open up the Tools section of the editor and select the Noise Reduction tool that you’ll find there.
As soon as it is selected the Noise Reduction tool will automatically zoom in on an area of your photo so that you can see the amount of noise more clearly. All you need to do is control the Amount slider and increase it (i.e. move it to the right) to start smoothening the image and removing any graininess that is present.
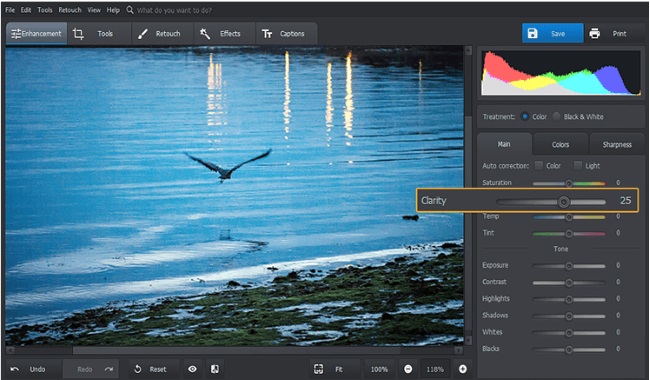
At times removing noise from a photo can smooth it a bit too much and cause it to look somewhat blurry. It would be best to compare it with the original photo using the Before/After button and then use the Clarity setting in the Enhancement tab to sharpen the photo slightly if you feel it is an issue.
By the time you’re done the amount of grain and noise in your photos should be dramatically reduced, leaving it looking relatively clean. It may be a good idea to then use some of the other features in PhotoWorks to improve the color balance, remove unwanted objects, cover up any imperfections, or even apply artistic filters.
To be perfectly honest PhotoWorks will enable you to edit your photos in almost any manner that you require. The best part is that it won’t force you to go through a steep learning curve, and will instead make sure that each of its features can be used quickly and effectively – just like the one described above.
