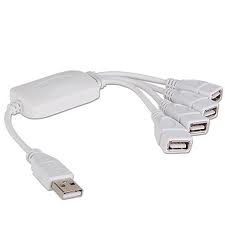
Digital cameras, scanners, mp3 players and almost every other electronic device are designed to be connected to your computer. All new computers make it simple to connect these devices with the use of the USB or Universal Serial Bus port. But with the many devices you have, you may run short of these 
USB 2.0 hub contains several usb ports. So rather than unplugging one device to plug in another, a usb hub allows you to connect multiple devices. To setup a usb hub on your computer you need to be sure that your system allows you to connect the hub.
Suggested Reading: Choosing the best photo printer
Next you need to do is to consider the reason you want to purchase a USB hub. This will help in deciding the type of usb hub you want to purchase. The two types of USB hubs are the self powered hub which draws power from an external power supply and the bus powered hub which is inserted in an expansion slot and draws power from the motherboard. Some devices that use large amounts of power, work poorly with bus powered hubs. A scanner for example, will work much better connected to a self powered USB hub. When connecting a device to the USB hub, see what version of usb it may be. USB 1.0 was the first version released and today the fast version is the usb 2.0. All USB 2.0 hubs are backward compatible, allowing them to run the slower USB 1.0 devices. The price of a usb 2.0 hub varies from about $25.00 to $65.00 and comes in several brands. The price depends on the number of ports you want on the hub.
Suggested Reading: Laser printing for effective printing
Installing your new usb hub: Its always a good practice to backup your files before you work in your computer. Remove the hub from its packing and carefully inspect it for damages and be sure all components are present. If you have a self powered usb hub, plug the power cord in an outlet and connect the usb cable from the usb hub into an open USB port. With the hub connected, insert the cd that came with the hub and install the software onto the hard drive. Set the USB hub in a location where you can easily connect your scanner, modem or other devices.
Remember that your computer only runs at the highest usb speed. If your hub is a USB 2.0 but your computer only supports USB 1.0 then the 1.0 connection will be your max speed. If your USB hub is bus powered, install the card in an empty expansion slot. Start the computer and your operating system should recognize the new device. Install any software that came with the hub.
Installing a USB hub is pretty easy, isn’t it ?? Do share your views !!
That’s all for now, stay tuned with Tech Crates
